Hi everyone,
A quick blog post with updates on our feelings regarding Super glue vs. Epoxy -- now that we have discovered the existence of Super Glue Accelerators!
A few weeks ago, while playing our Starfinder Campaign - and working on the crazy idea of merging in Battletech 'mech fighting rules we got to talking about the table about glues - and bemoaning the reality (as we understood it) that only epoxy dealt well with metal models the likes of which you often need to use with Battletech. Then, Mr. T. (one of our friends and Starfinder player) chimed in that we should consider using a super glue accelerator. Don't recall what he suggested - something like "Zip It".
We were absolutely intrigued. Is this the secret so many utilize to make superglue workable for them? Is this what we have been missing?

Because, quite honestly, most of our experiences with superglue had been poor. Either we couldn't get it to set; or we glued our fingers together; or what we did glue fell and broke into many pieces.
So, we asked more. "Be careful you don't burn yourself, though!" cautioned Mr. T. He went on to explain that the heat of reaction between the superglue and the accelerator released quite a bit of heat and that you could really burn your fingers. He indicated that he had done so many times over the years.
Well, we had to try this out! Asking at Game Kastle in Mountain View we learned that they had two such products on the shelf. We picked out "Insta-Set" and headed home to try the stuff with one of our Battletech models (metal, of course).
First Experience
To try out the Insta-Set we figured we had better be careful!

And, maybe those were quite good precautions. First of all - we did learn just how hot the reaction can make things (quite hot - very easy to understand the burning risk!!) Secondly - at one point a little bit of glue got onto a glove - and the spray hit that - and WOW! quite a hot feeling to the fingers inside of the glove. The good news is that the hot, curing glue was not stuck to the fingers - and we were able to quickly rip the glove off and get the heat away from our skin!!!
[PS: We also read some online forum posts with discussion of whether or not the accelerator materials are flammable. One person reported nearly burning off their eyebrows testing this out with a lighter! No need to repeat that experiment, we'd guess!!]
But, when all was said and done - it really, really worked. We whipped a metal model of a Clan 'mech together in something like 5 or 10 minutes. And, that my friends would have taken us hours or days or curing time with epoxy.


We built up another 'mech - a Stalker - which we had as bits - and then did a few tests to see how well the super glue bonds were holding together. Not too bad! The model was pretty sturdy!

So, we certainly learned that the accelerator is truly useful product - though with hazards and requiring very careful use.
What's our net judgement?
Our feeling is that even with the accelerator (which does cure the super glue) you still end up with a material which is more brittle - has lower fracture toughness - than the polymer you end up with joining your parts when you use epoxy glues.
Here's a nice article talking in a bit more detail about the differences. In their words, "Super Glue sets quickly and has a very low shearing strength while epoxy sets slowly and has good shear strength."

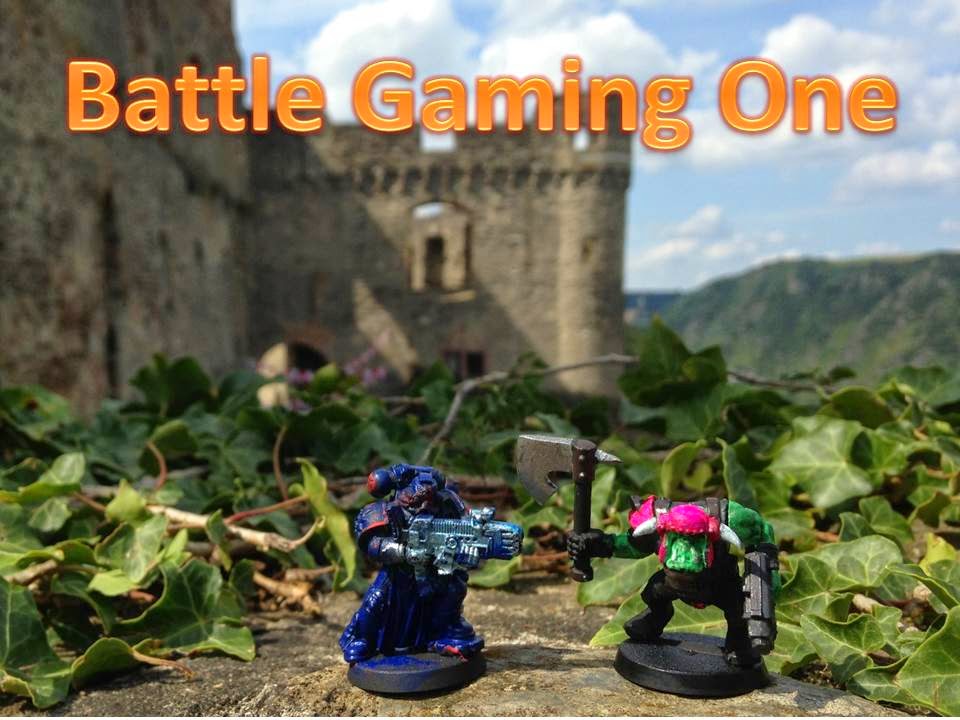
And, if you don't mind indulging the paint job which one of us (who is not so great at painting) managed, please check out our Ghazkull Thrakka.
Read more: Here's our original blog posting where we struggled with resin, model glue and superglue
We gave up trying model glue (wrong for resin, we learned!!) and super glue (we couldn't manage it) and put him together with epoxy. And, yes, if you look hard at his joints, you find some globs of the stuff, which, while Orky do detract from the model's appearance.

So, maybe what we'll do in the future is use a hybrid ?? Put metal and resin model together carefully with super glue and accelerator. And, then add some epoxy where we feel the joint might be whacked if the model falls on the floor. (And, yes, if anyone is wondering, our Ghazghkull has survived many drops from table to floor.)
A quick blog post with updates on our feelings regarding Super glue vs. Epoxy -- now that we have discovered the existence of Super Glue Accelerators!
A few weeks ago, while playing our Starfinder Campaign - and working on the crazy idea of merging in Battletech 'mech fighting rules we got to talking about the table about glues - and bemoaning the reality (as we understood it) that only epoxy dealt well with metal models the likes of which you often need to use with Battletech. Then, Mr. T. (one of our friends and Starfinder player) chimed in that we should consider using a super glue accelerator. Don't recall what he suggested - something like "Zip It".
We were absolutely intrigued. Is this the secret so many utilize to make superglue workable for them? Is this what we have been missing?

Our superglue accelerator and super glue side-by-side with the old trusty epoxy bottles
Because, quite honestly, most of our experiences with superglue had been poor. Either we couldn't get it to set; or we glued our fingers together; or what we did glue fell and broke into many pieces.
So, we asked more. "Be careful you don't burn yourself, though!" cautioned Mr. T. He went on to explain that the heat of reaction between the superglue and the accelerator released quite a bit of heat and that you could really burn your fingers. He indicated that he had done so many times over the years.
Well, we had to try this out! Asking at Game Kastle in Mountain View we learned that they had two such products on the shelf. We picked out "Insta-Set" and headed home to try the stuff with one of our Battletech models (metal, of course).
First Experience
To try out the Insta-Set we figured we had better be careful!
- We used it as a two person operation. One of us put down the super glue; the other of us did the holding of the parts; then person one set down the super glue and sprayed on the accelerator. (So, the two were never close to each other.)
- We wore gloves. (We were worried about the "blistering hot" comments we had gotten when we bought the Insta-Set.)
- We were prepared for really hot. Used our needle nose pliers for some of the early piece holding.

The bottle of Insta-Set uses a pump-spray action. It was a little tricky to manage in all angles. The liquid is quite volatile. The stain you see on our paper back we used to catch over-spray was gone within 15 minutes.
And, maybe those were quite good precautions. First of all - we did learn just how hot the reaction can make things (quite hot - very easy to understand the burning risk!!) Secondly - at one point a little bit of glue got onto a glove - and the spray hit that - and WOW! quite a hot feeling to the fingers inside of the glove. The good news is that the hot, curing glue was not stuck to the fingers - and we were able to quickly rip the glove off and get the heat away from our skin!!!
[PS: We also read some online forum posts with discussion of whether or not the accelerator materials are flammable. One person reported nearly burning off their eyebrows testing this out with a lighter! No need to repeat that experiment, we'd guess!!]
But, when all was said and done - it really, really worked. We whipped a metal model of a Clan 'mech together in something like 5 or 10 minutes. And, that my friends would have taken us hours or days or curing time with epoxy.

Our new and old trusty glue options with Battletech 'mechs in the background

Here are the two 'mechs we built up in 15-20 minutes. Much, much faster than we could have done with epoxy alone.
We built up another 'mech - a Stalker - which we had as bits - and then did a few tests to see how well the super glue bonds were holding together. Not too bad! The model was pretty sturdy!

Our Battletech models posing with the super glue and accelerator
So, we certainly learned that the accelerator is truly useful product - though with hazards and requiring very careful use.
What's our net judgement?
- This stuff is great for working with metal models. And, we're guessing it's not bad at all with resin either.
- Be careful - wear gloves.
- Be careful - store separately. [We don't like thinking about what would happen if a bottle of one mixed with a bottle of the other.]
- If you do have a long time for curing and want something more sturdy - use epoxy :)
Our feeling is that even with the accelerator (which does cure the super glue) you still end up with a material which is more brittle - has lower fracture toughness - than the polymer you end up with joining your parts when you use epoxy glues.
Here's a nice article talking in a bit more detail about the differences. In their words, "Super Glue sets quickly and has a very low shearing strength while epoxy sets slowly and has good shear strength."

A set of curves for fracture toughness of materials. Metals are up in the upper right. Things like glass are toward the bottom. We figure epoxy sits higher on a set of curves like this than super glue.
And, if you don't mind indulging the paint job which one of us (who is not so great at painting) managed, please check out our Ghazkull Thrakka.
Read more: Here's our original blog posting where we struggled with resin, model glue and superglue
We gave up trying model glue (wrong for resin, we learned!!) and super glue (we couldn't manage it) and put him together with epoxy. And, yes, if you look hard at his joints, you find some globs of the stuff, which, while Orky do detract from the model's appearance.

Here is our Ghazghkull Thraka model. Assembled with epoxy!
So, maybe what we'll do in the future is use a hybrid ?? Put metal and resin model together carefully with super glue and accelerator. And, then add some epoxy where we feel the joint might be whacked if the model falls on the floor. (And, yes, if anyone is wondering, our Ghazghkull has survived many drops from table to floor.)